Benefits of Using Trekking Poles While Trekking
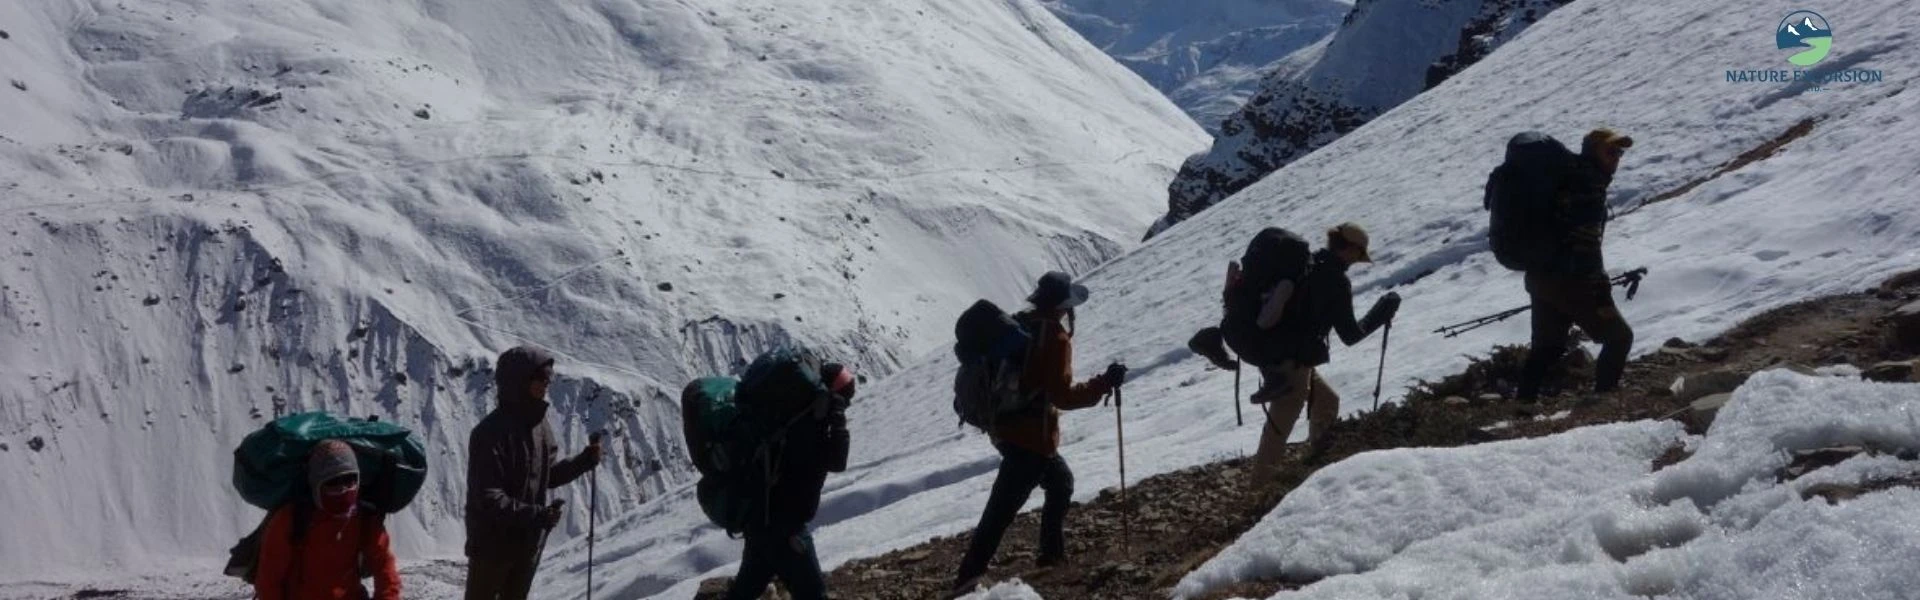
Trekking poles may look simple, but they make a big difference on the trail. They help reduce pressure on knees, improve balance, and increase speed. With poles, trekkers feel less tired and more confident as the journey goes on. Let's discuss the key benefits briefly.
Improve Balance and Stability
Trekking poles improve balance and stability on the trail. They turn a two-leg walk into a four-point support system. This wider base helps the body stay upright on loose mud, snow, and gravel. Research shows that extra ground contact can lower body movement and reduce the chance of slips. Many trekkers feel more stable on rocky trails because poles let them check the ground before they step.
Poles also handle challenging sections such as streams and gorges. Planting both poles before moving gives a strong support point on climbs and descents. On downhill trails, poles act like brakes and help control speed. On water crossings, they help check depth and current strength before proceeding. They also help you keep a better balance and let you catch yourself more quickly if you slip.
Reduce Pressure on Knees and Joints
Trekking poles decrease pressure on knees and joints during long walks. They move part of your body weight from the legs to the arms and shoulders. This can reduce the impact force on the legs by about 11-13%. On downhill trails, the load on each knee can drop by up to 25%. This reduction helps to protect joints and lowers pain after long days on the trail.
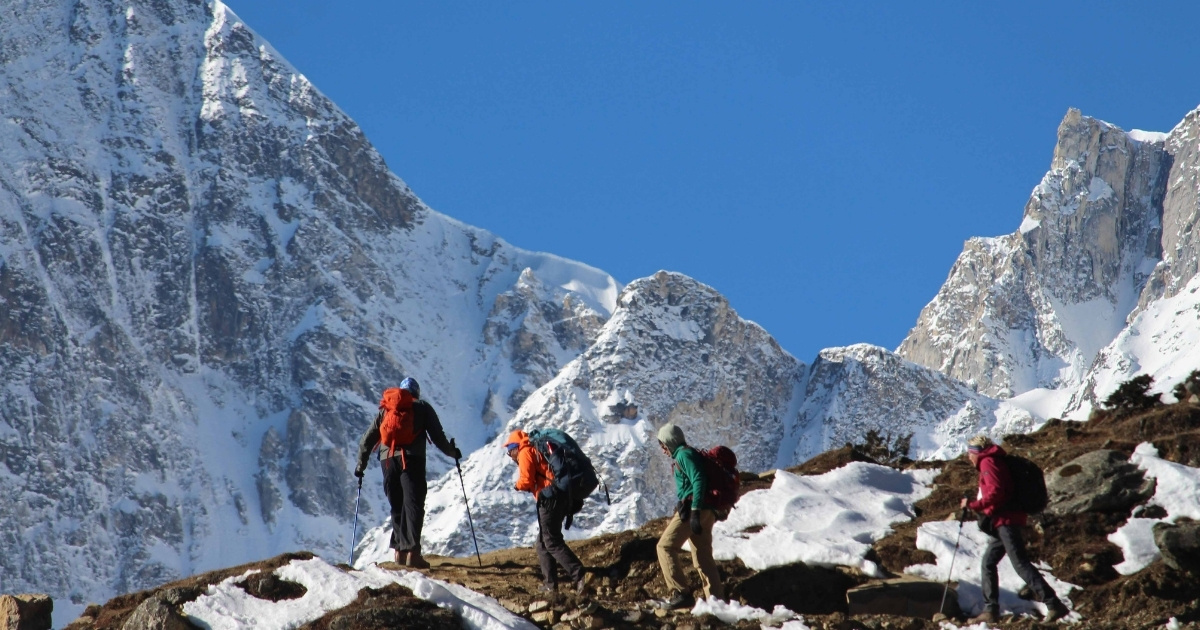
Poles also control impact before the foot hits the ground. On descents, the pole touches first and absorbs part of the force. This reduces stress on knees, hips, and ankles. Poles also support a more upright posture, which keeps the body aligned. The good posture reduces joint strain and helps trekkers walk longer with less discomfort.
Better Posture and Increased Endurance
Trekking poles help the body stay upright on long walks. They reduce the forward bend that often happens with a heavy backpack. This keeps the spine straight and the shoulders open. Also, better posture helps the lungs expand more fully. This improves breathing and helps the body use oxygen more efficiently. At higher altitudes, this support becomes even more important.
Poles also increase stamina over long distances. They move about 20% of body load from the legs to the arms and upper body. This reduces leg fatigue and helps muscles last longer. Trekkers using poles can improve uphill climb by up to 10% and feel up to 20% less tired. A steady pole rhythm also supports an even pace and helps you use less energy throughout the day.
Trail Clearing and Assessment
Trekking poles help assess the trail before you put your full weight down. They act like an extra hands to test difficult terrain. On rivers or snow bridges, which you often meet on the Everest Base Camp trek, poles help you check depth and stability and lower the risk of slips or falls. On muddy or slippery surfaces, poles help to find stable ground and keep each step safe. Hikers who use the right pole fall less and move more confidently on challenging trails.
Poles also help clear obstacles without touching them directly. They can push aside brush, thorny branches, or spider webs. After rain, the poles can knock off water from plants to stay dry. Using rubber-capped tips protects soil and reduces trail damage. Poles even serve as emergency tools for splints or shelter supports.
Better Circulation and Full Body Workout
Using trekking poles improves circulation and prevents swelling in the hands and arms. Holding and moving the poles force muscles in the hands and forearms to squeeze continuously. This action pushes blood and fluids back toward the heart by reducing the common swelling known as “sausage fingers.” Keeping your hands slightly raised helps blood flow better, which keeps your hands warmer on long hikes.
Poles also turn a regular hike into a full-body workout. While normal walking uses about 35% of your muscles, poles can engage up to 90%. Triceps, shoulders, back, and core all work with every push. This increases calorie burn by 20 to 46% and boosts heart rate and oxygen use by around 20%. Each step strengthens the core, improves overall fitness, and puts less strain on your legs.
Why Bad Pole Technique Costs You More Than No Poles At All
Downhill walking puts forces on the knee joint that can reach several times body weight with every step. That load has to go somewhere, and without support, it goes straight into your cartilage and tendons. Trekking poles are designed to redirect some of that force into your arms and shoulders instead. But that only happens if the pole is planted at the right angle, at the right moment, with your hand held by the strap so you can loosen your grip between steps.
Christopher Knight, Ph.D., who led the University of Massachusetts part of the study, found that hikers who used poles correctly put less stress on their leg muscles and joints. More of the work was shared with their arms. Hikers carrying heavy packs on a treadmill also said the walk felt easier with poles than without them.
Another study published in Medicine & Science in Sports and Exercise supports these findings. Researchers asked people to walk on a treadmill with a backpack that weighed 30% of their body weight and set the treadmill to a five-degree incline. Those who used two poles took longer steps, used their leg muscles less, and did not use as much energy. This shows that knowing how to use trekking poles correctly matters more than simply having a pair.
How to Size and Adjust Your Trekking Poles
Get the length wrong, and every other part of your technique falls apart. Here is how the sizing changes with the terrain:
Terrain | Pole Adjustment | Elbow Angle |
Flat or rolling ground | Standard length (grip at hip height) | Roughly 90 degrees |
Uphill | Shorten by 5 to 10 cm | Slightly less than 90 degrees |
Downhill | Lengthen by 5 to 10 cm | Slightly more than 90 degrees |
Steep switchbacks | Shorten the uphill-side pole, lengthen the downhill-side pole | Varies by side |
Most modern poles use a flip-lock or twist-lock mechanism with adjustment markings in centimeters. Set both poles to match before you start, and recheck the adjustment whenever the grade changes for more than a few minutes.
Plan Your Own Adventure
Choose your destination, itinerary, travel dates, and trek style to create a trekking experience that fits your plans.
Grip and Wrist Strap: The Step Most Trekkers Get Wrong
Push your hand up through the bottom of the wrist strap first, then bring it down to grip the handle. Never place your hand over the top of the strap. Done correctly, the strap should fit comfortably across the back of your hand and carry some of the load with each step, which means your fingers stay relaxed instead of gripping the pole tightly all day. Done incorrectly, the strap does nothing, your forearms may get tired within an hour, and the pole can slip from your hand on steep downhill areas.
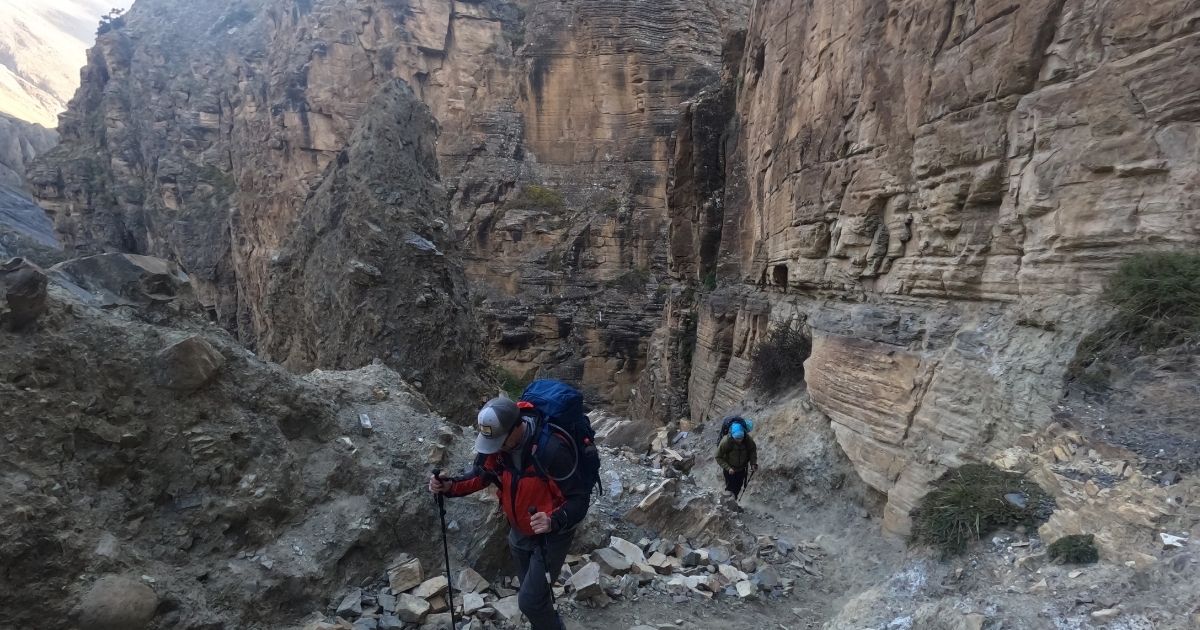
Adjust the strap so two fingers fit between it and your wrist. Too loose and your hand slides around inside it. Too tight and it restricts circulation on a long descent. On very technical or icy sections, some trekkers remove their hands from the straps entirely so a pole does not drag them off balance if it gets wedged between rocks.
Walking Rhythm: Uphill, Downhill, and Flat Ground
Your walking rhythm should change with the type of ground you are on. The sections below explain clearly how to use trekking poles on uphill, downhill, and flat ground.
- On flat ground: Place the pole tip level with your heel or slightly behind it when it touches the ground. Push against the pole as you move forward. Poles can help you walk longer because your arms take some of the work that your legs would otherwise do alone.
- On climbs: Plant your poles farther ahead and use them to push your body upward. This lets your arms and shoulders do some of the work instead of putting all the effort on your thighs. On very steep sections, some trekkers place both poles at the same time and take a short step between each pole placement.
- On descents: Place the poles in front of your feet, with a slight forward angle, and let them support some of your weight before your front foot lands. It is also the part many trekkers skip when they get tired, even though that is when it is most useful.
Using Poles on Stream Crossings and Loose Terrain
When crossing a stream on stones or a suspension bridge with a loose plank, plant both poles before shifting your weight, rather than moving a (left foot, right foot) and a pole at the same time. On loose pebbles, keep your poles a little wider apart and check that each pole is stable before putting your full weight on it. The pole tip can slip on loose rocks just like your boot can.
Poles reduce the odds of a fall. They do not eliminate the need to watch your footing.If you are planning a longer trek with many climbs and descents, a guided trip with Natureexcursion may also be a good option. Guides know which parts of the trail needs a slower speed with both poles planted and which parts are safe to walk at a normal speed. This makes it easier for first-time trekkers to use the right technique without having to guess.
Should You Buy or Rent Trekking Poles in Nepal
Hikers traveling to Nepal can buy new gear, rent equipment locally, or bring personal gear from home.
Option | Average Cost (USD) | Pros | Cons |
Bring Personal Poles | USD 80 to 200 | Verified quality, pre-tested locks, custom fit | Need packing in checked luggage |
Buy in Kathmandu / Pokhara | USD 15 to USD 20 (Knockoff); USD 100+ (Genuine) | Wide availability in local gear shops | High chance of cheap fake locks breaking |
Rent in Kathmandu / Pokhara | USD 1 to 3 per day | Cost-effective, avoids international transport | Wear and tear may vary, and the lever may slip |
Which Treks in Nepal Are Easier with Trekking Poles
Treks with stone steps and large changes in height are where trekking poles can help the most. The Everest Base Camp Trek has thousands of stone steps around Namche Bazaar and steep areas near Thukla Pass. Poles can reduce the pressure on your knees and legs on these long stone paths.

The Annapurna Sanctuary Trek needs navigating the Ulleri staircase, which consists of 3,300 steep stone steps. Using poles in this area transfers force away from the tendons around your knees. The Manaslu Circuit Trek has sharp up and downs near Larke Pass at 5,106 m. Trekking poles can help you stay steady on icy slopes at this high altitude.
Do You Need Trekking Poles for Every Trek in Nepal
You do not need poles for short, cultural day hikes or flat valley walks like Kathmandu, Pokhara Chitwan Tour in Nepal. Low-altitude trails with minimal elevation changes do not generate severe joint impact. However, for any trek involving high mountain passes, heavy packs, or long descents over 1,000 vertical m in a single day, trekking poles are essential protective equipment.
How to Maintain Trekking Poles
Proper care helps your trekking poles last longer and prevents problems with the locking system on remote trails. After every trek, take the pole parts apart. Wipe the aluminum or carbon sections with a damp cloth to remove dirt, mud, and other deposits. Let all the areas dry completely before putting the poles back together. Storing wet aluminum poles can cause rust inside the shafts and make the locking parts stuck.
Check the small screws on the pole locks regularly and tighten them so the levers close comfortably with your thumb. Replace worn rubber tips and cracked snow baskets before starting a long mountain trek.
Common Trekking Pole Mistakes
- Setting the same length for uphill and downhill. This is the single biggest technique error and the easiest to fix mid-hike.
- Placing hand over the strap instead of through it, which prevents the strap from supporting the load as it is designed to do.
- Moving both poles with the same foot breaks the natural cross-body rhythm and wastes energy.
- Planting the pole too far ahead on flat ground turns it into a brake instead of a push-off point
- Never adjusting mid-trek, where poles may not work well because the ground changes throughout a multi-day route.
- Ignoring rubber tips on hard surfaces. Metal tips work better for mud, snow, and dirt, but rubber tips protect stone trails and teahouse floors.
Have Trekking Questions?
Not sure which trek suits your experience? Talk with our trekking experts about routes, preparation, trekking poles, and your travel plans.
Conclusion
It is easy to use trekking poles the wrong way during the first few days of a trek because the geography, high altitude, and backpack weight may all feel new. Practice your grip, adjust the length of the poles, and use the poles with the opposite foot on a local trail before your trip. This will help you get used to the movement before you face Himalayan trails with tired legs.
If you want to practice while trekking, Natureexcursion itineraries include a guide who can check your pole use during the first hour on the trail. Using poles correctly can make your trek easier and safer, while using them the wrong way only adds extra weight to your hands.
Frequently Asked Questions
Do I Need Trekking Poles for Everest Base Camp or Annapurna?
You do not strictly need them. People complete both treks without poles every season. But long downhill walks at high altitude can put a lot of pressure on your knees when you carry a heavy daypack. Trekking poles can reduce this pressure and make you feel less sore the next day.
Should You Use One Pole or Two?
Using two trekking poles is better for most trekkers. One pole can help with balance, but two poles give better support and reduce pressure on your knees when walking downhill.
How Long Should Trekking Poles Be for Your Height?
As a starting point, set the pole length so your elbow forms roughly a 90-degree angle with the grip in hand and the tip on the ground, then adjust shorter for climbs and longer for descents as described above.
What Is the Difference Between Hiking Poles and Trekking Poles?
Hiking poles and trekking poles are the same type of equipment, and the terms are used interchangeably. The main difference is the design rather than the name. Trekking poles are adjustable and built for longer mountain walks, while some hiking poles are simpler and intended for shorter walks.
Are Carbon Fiber Trekking Poles Better Than Aluminum?
Carbon fiber trekking poles are lighter, while aluminum poles are more resistant to bending and impact. Carbon fiber poles are a good choice for trekkers who want to reduce pack weight. Aluminum poles are better if you expect rough use, contact with rocks, or need stronger support for heavy loads.
How Do You Pack Trekking Poles for Air Travel?
Pack trekking poles inside your checked luggage because trekking poles are not suitable for carry-on baggage. Collapse or fold the poles and place them inside your duffel or suitcase so the tips and locks do not damage other equipment.
Are Trekking Poles Good for Seniors or People With Bad Knees?
They can help older hikers and people who feel uncomfortable when walking downhill. However, trekking poles do not fix knee problems. Anyone with an existing knee condition should choose a route that matches their ability and seek medical advice when needed.
Telescopic vs. Folding Trekking Poles: Which Is Better?
Telescopic poles are better for easy length adjustment, while folding poles are better when low packed size matters. Telescopic poles are useful on routes where you change pole length for climbs and descents.
When Should You Avoid Using Trekking Poles?
You should avoid using trekking poles when they make it harder to keep your balance or may get stuck on rocks or roots. Take your hands out of the straps when there is a risk of a pole getting trapped.
Do You Really Need Trekking Poles for Hiking?
No, trekking poles are not necessary for every hike. They become more useful on sharp uphill or downhill paths, rough or irregular ground, or shifting rocks, and on treks where you carry a backpack for several hours each day.
Should Beginners Use Trekking Poles?
Yes, beginners can use trekking poles if they learn the basic technique before a long trek. Start by practicing the correct grip, strap position, pole length, and opposite-foot rhythm on easier ground.